|
This week was all about changes, and a new design philosophy.
After last week's progression, I was feeling optimistic about Armageddon. I was happy with the level design, and ready to continue adding to the content we currently had. I spent the majority of Sunday looking into the Super Character Controller, a unique open-source character controller based in unity, that seemed to offer all of the benefits we needed. Unfortunately, I concluded that the controller would not be useful, as it interacted with physics in a way that we were incompatible with. Because the SCC lacks a rigidbody and interaction with physics, as well as issues with trigger colliders, we were unable to use it. My attention then turned to improving the character controller. After working with the SCC, i assumed that i would be able to improve it by tweaking values, rather than rewriting scripts. After finding little success, I decided to purchase and add the Complete Physics Platformer Kit, from the unity store. Once I had spent some time with the package, modifying and adding functionality from our previous controller, I was happy with the control scheme and the ease at which we could go in and modify it. I continued to mess with and adjust the grapple and movement values - in particular the friction settings. After being stuck on a large amount of box colliders, I played around with the friction levels in earlier builds. The result: frictionless material was the most effective at the player not getting stuck on geometry. I have again applied frictionless materials to objects colliding with the new controller, and have enjoyed similar success. At the same time, the entire team was struggling with the concepts of level design, so on the Thursday we made the decision to scrap the existing level and begin working on smaller, easy to navigate areas where we could teach the player mechanics in a focused area. This is primarily for Armageddon and the Vertical Slice will have a more expansive (although still mostly linear) path that is based around teaching mechanics and then letting the player show off. I was completely happy with this, as I had begun encountering frustrations with how to design levels for large open spaces - the player was spending a large amount of time in the spaces I had designed simply running around, which did not make for particularly interesting gameplay. Moving forward, we will be taking an approach where the mechanics come first - even before environments are created - where we create an actual greybox before the rooms and styles are decided upon. Then, taking the puzzles into consideration, we will design areas that players enjoy playing around in. In addition to these changes, the vast majority of things I worked on were involved in populating the level, and the interactions between elements in the scene. I created a 'damage laser', which 'shocks' the player (currently freezes them) and disconnects the grapple, before dropping them to the ground. This adds an extra inconvenience to the player, which we did not have many of before. As part of the character rebuild, I have also tweaked and altered the animations again, and we have a new jumping animation to be added in on Friday, which will be a welcome addition to the player movement. Finally, the door object script was redone to work with Corne's door, which slides up and away from the player. In a way, the door script is endemic of the issues we have been having - design the mechanic (the script) receive the assets (the door) then have to redesign the things we have created to incorporate the assets we have. I think with this new design philosophy that the team has, we will work much more efficiently than before.
0 Comments
The fourth week for our team was mostly about refinement of mechanics, and I have started building areas of the level. After watching and reading content about level design, I decided that moving forward, the level's rooms would be tacked with a tiered approach. The design philosophy was to introduce the character to the mechanics in a simple, sequenced way. Then, gradually build on this approach. Because of the large nature of the rooms, I decided to treat each of them as an entire 'minilevel'. From the beginning to the end of the room, I would teach the player the mechanic in its entirety. The first level, a large warehouse, was intended to teach the player platforming. Starting from the bottom, the player was supposed to move around the simple, pathed ai in a way that would allow them to dodge the guards, and make their way up onto the crates. Then, the player was required to path along the crates until they reached the end of the level. This area (unlike the other two areas) does not have a keycard required to move through this area. Rather, the player moves up along the crates, then jumps onto a gantry which they can walk along. 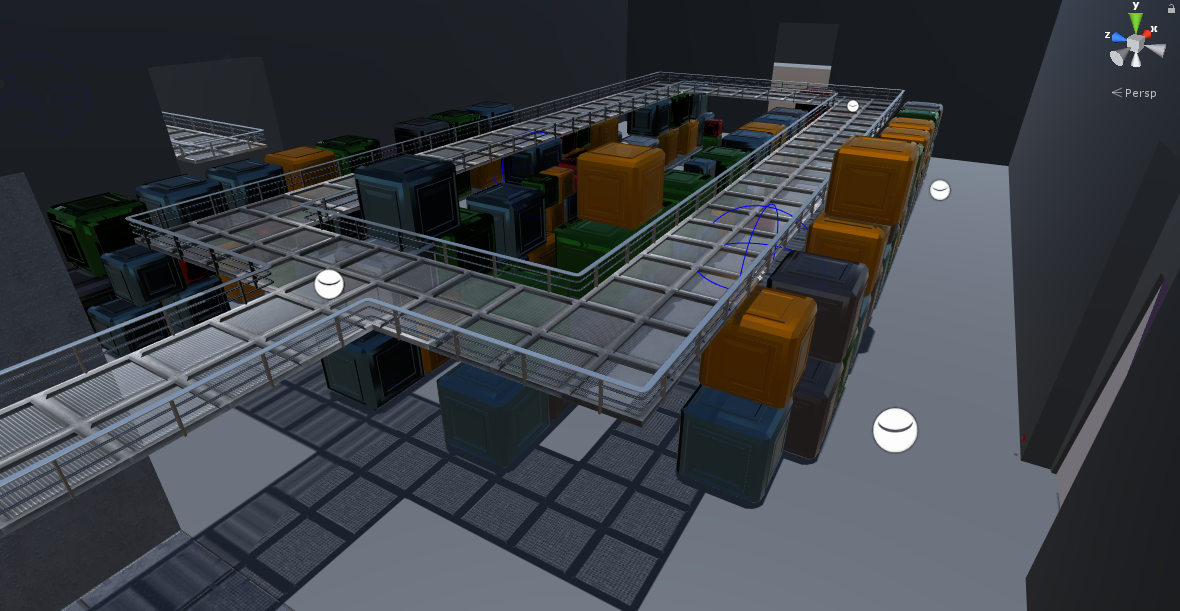 The warehouse area appropriately conveys the sense of scale I was looking for, and the lighting helps. All this area needs is a wall texture, and environment dressing. The second area was supposed to include two levels, that the player could move up and down between by jumping up at particular points. The player had to acquire a keycard and use it to open the door, before progressing to the next area. This area had initial problems, with a lack of focus being the most apparent. I chose to remove the bulk guards from the below section, once the assets were put in. I again placed two guards in the area, with one rotating from a singular vantage point. The point here is to introduce the player to static guards, who rotate. Moving forwards, I may change around the order of the warehouse and the labs, because the order of teaching these different mechanics seems out of order. It would make more sense for these rooms to be the other way around, because the rotating guard is easier for the player to deal with. 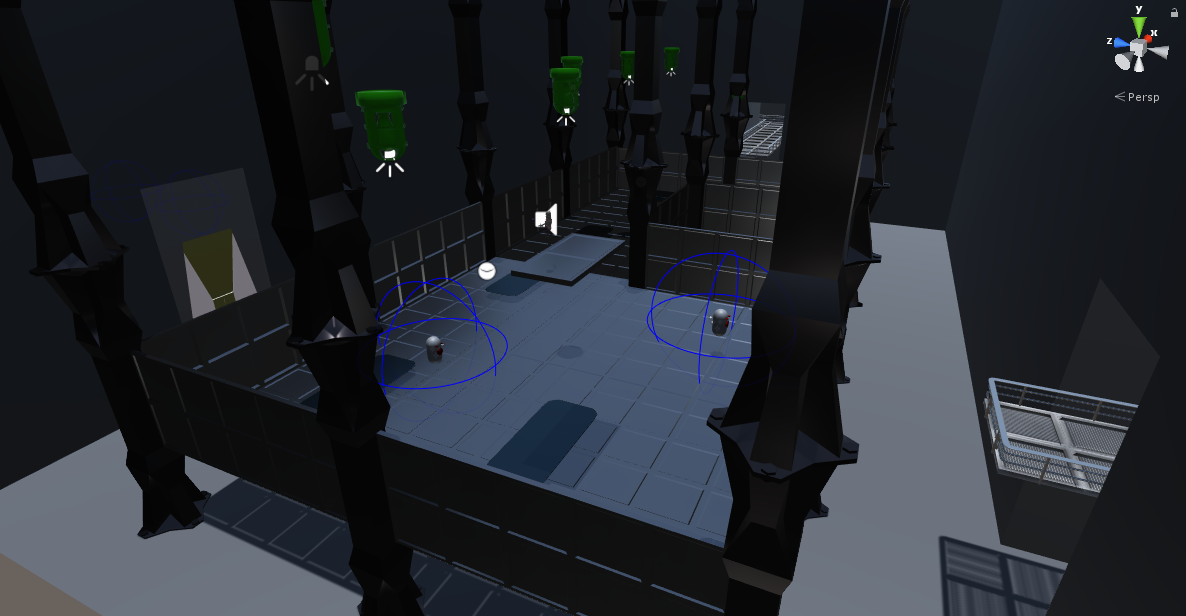 The AI on the right rotates his view left and right, while the AI on the left paths through the lab area. The mini lab again has a similar approach, with both guards rotating. However, the rotating guard behind the door has a different position command. He breaks his rotation to take a short walk around the table containing the next key card. This shakes up the rotating guard expectation that the player has – and by creating pressure for the player their expectations are shaken up. 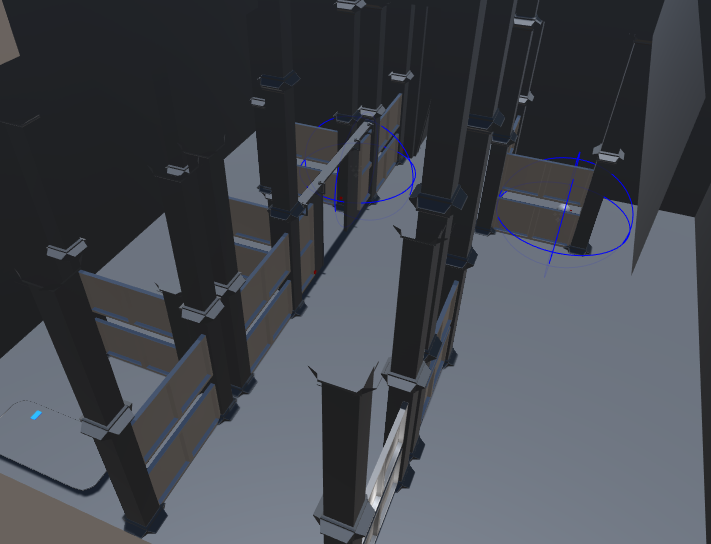 This shows off the final design of the lab. Some of the walls will become transparent to allow AI to see through. After these initial design thoughts, I had discussions with both Josh and Corne about the level design, and their concerns. Josh was rightly concerned about the size of the level, and the time taken to travel through and between the rooms. To alleviate these issues, I placed a large walkway along the top of the scene. The idea behind this was to allow the player to understand instantly that the bottom of the scene was an accessible, but not completely necessary, place to go. The elevated position also made it easier for the player to navigate around. After Friday, the entire level was concepted out design wise, and the only requirement now is to replace the greyboxing assets with the assets for the vertical slice completion stage. This week I also worked on the door, adding better support for moving up/down as opposed to rotating, and adding better cycles of animations. Because of the addition of double Jump, I feel like we might have to adjust the jump animations somewhat later on. Week four was a very productive week for the team. With Wellington only a week and a half away, we still had a lot to do. My main goal was to start texturing the environment and characters so that they’d we could start seeing the atmosphere and mood of the game. After a lot of research, I decided to teach myself Substance Designer and Substance Painter, so that we could produce stylised PBR materials for our world. Learning this software has certainly slowed things down initially, but after completing the main enemy for the first level in painter, I feel that my skills have improved massively. Learning Substance Designer was a little trickier, as its node based, and logic isn’t exactly my strong suit. My first attempts at a tileable metal floor tile for the prison have turned out better than I thought they would, but may need revisiting later down the track to try and get them to look a bit cartoonier. The textures for the guard have turned out really nice. Again, I may need to revisit some models later to add a layer of hand-painted texture, but for now i’m really happy. The design tenants that i’m trying to stick to texture-wise is to keep details low, keep colours saturated and dial down normal detail and really any noise that I can in any of my textures. By keeping things subtle, flat and brightly coloured, I think that after a bit of practice, i’ll be able to get a good pipeline down. The guards need a weapon, which isn’t going to be in the game by wellington. I have a few rough ideas for it, which I will be developing further, in about 2-3 weeks time. We want to keep our game violence free (well, relatively), so the guards won’t kill the player. Instead, they’ll zap the player, stunning them. For this, they’ll have a cool, old-school looking lazer gun, that has an electric eel strapped to it for ammo. Other version of the weapon could be slippers rubbing on carpet, two balloons rubbing together, etc. There will be one gun model, with different ammunition modelled separately that will snap on. Perhaps different ammo types will indicate the strength of the gun/enemy. For now, Scott will be animating the guards with a rough greybox of the weapon until the model is replaced later on. Ideally, by next Wednesday, the first level should be done and textured. We have most of the puzzle pieces floating around in different unity scenes, I think that Monday should ideally be trying to get them all in together. That way we can see how the game feels, see how all the systems interact, and go from there. For this week I worked on the last of the environment grey boxing in Unity. With the grey boxing I was able to start working on proper environmental pieces including hero pieces and props for the first part of the level; The Prison. The prison area serves as an introduction to movement for the player. 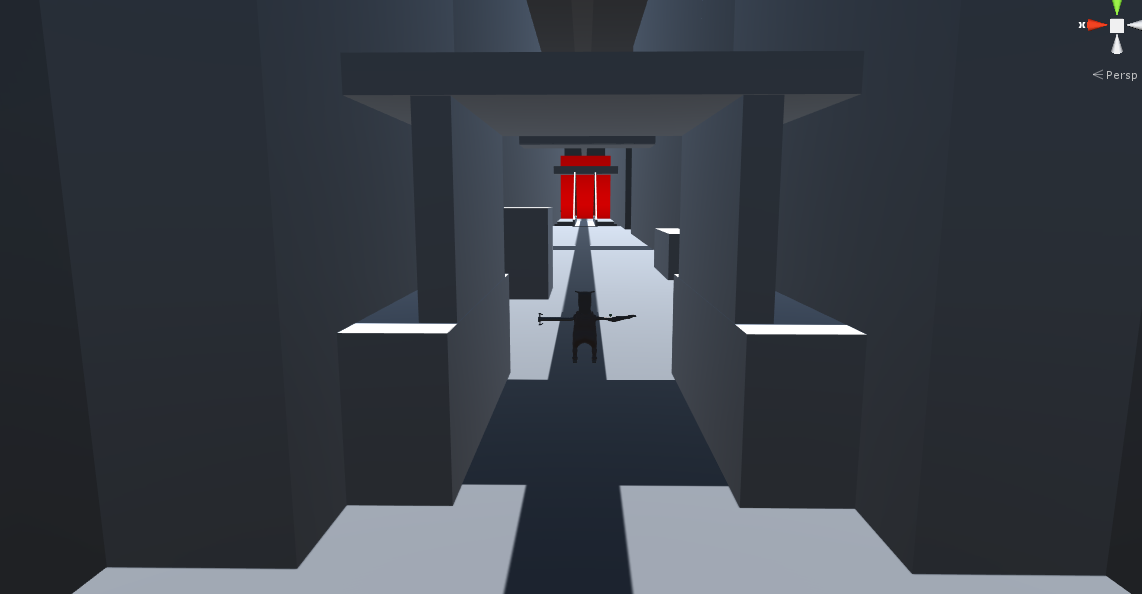 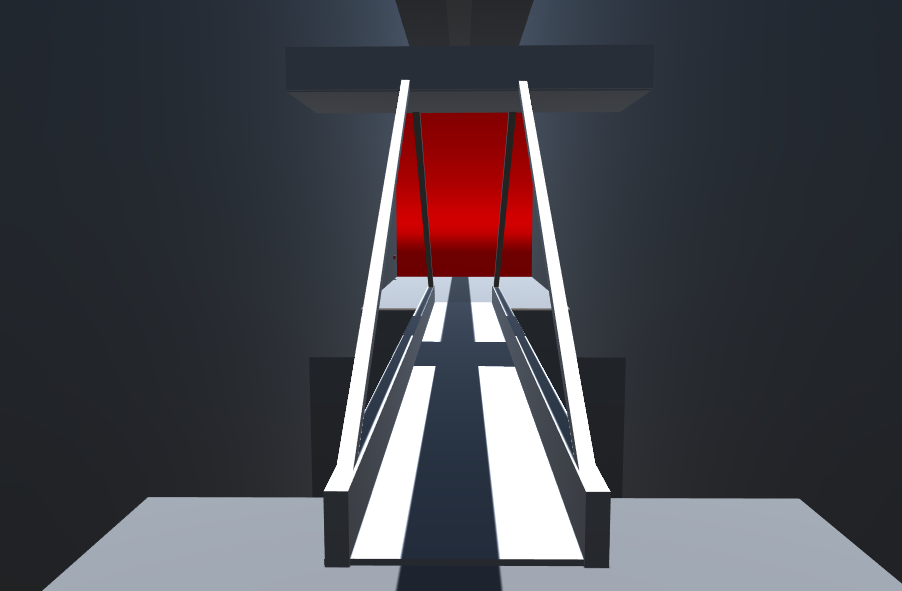 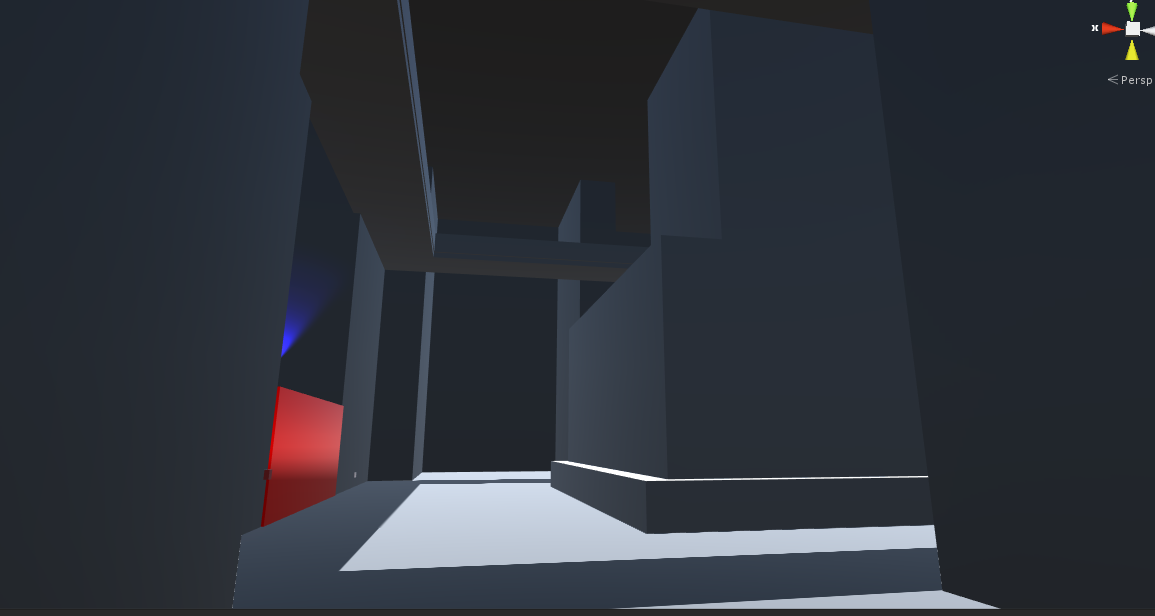 I started modelling props for the gym area as well. These serve as purely aesthetical static props. The player cannot interact with them. 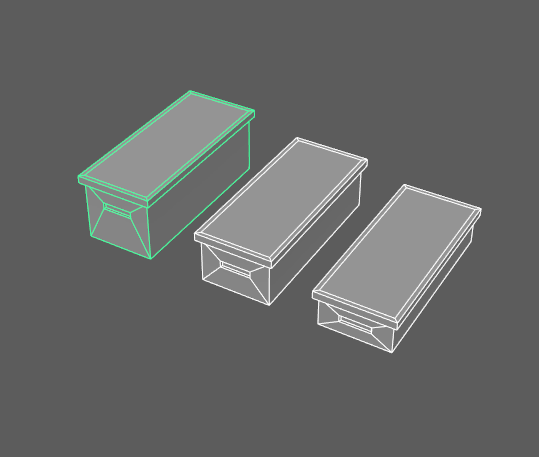 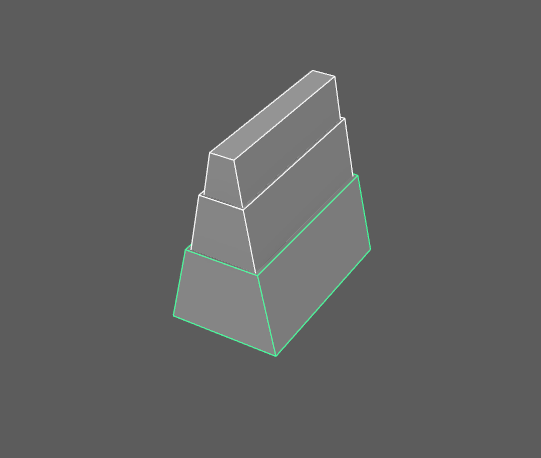 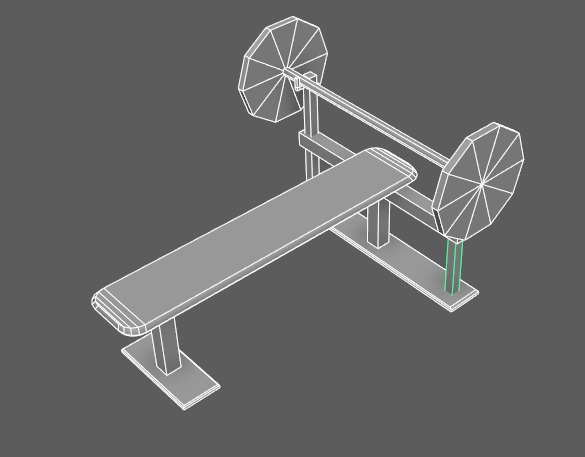 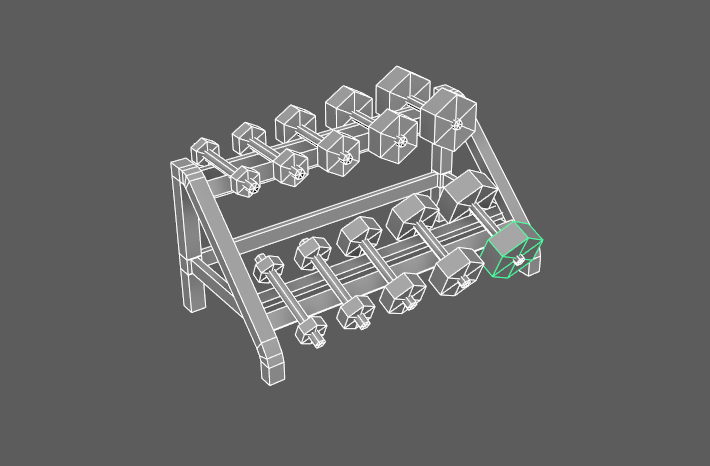 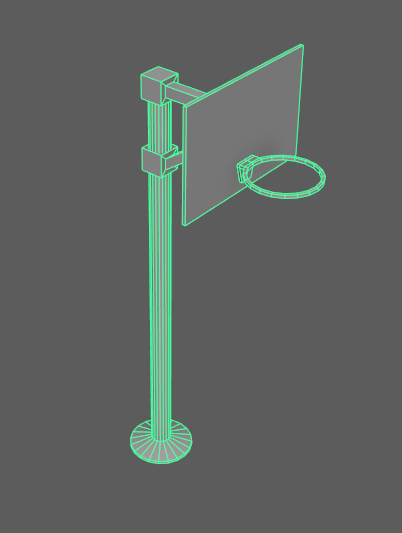 This week has been an important week as we have begun combining all our mechanics into the first level of the game. One of the biggest steps this week has been the implementation of our AI plugin which we have designed to help us easily implement AI path routes, vision and hearing distances within the game. During the week, I focused on implementing the ventilation system which is intended to act as a means of travelling through the level. Originally the concept was to use a ventilation system which would allow the player to crouch and physically move through the vent from entrance to exit. However, after some thought we decided to change this to function more like a portal which will teleport the player from the entrance of the vent to the exit. This decision was made as camera issues would prove to be a big issue with allowing the player to navigate through the vents in third person view. When designing this I did not want to do it in a way which would just move the player between the vents immediately. Instead I decided to create a fade to black function which faded the screen to black before moving the player from one point to the next and then faded back in once the player had been moved. I also ensured when implementing this system to make it modular and dynamic so that vents would be easier to set up in each of the levels to come. To do this I created a vent prefab which allowed us to easily drag another “exit vent” into the script to ensure that the linking of vents was easy to implement and use. I also set up the prefab to require an “exit camera” which would be switched to when moving the player from vent to vent. The reason we wanted another camera was to allow the player the chance to look around at the exit side of the vent before leaving in case there were any guards which may be alerted. This allowed us to easily set up another camera in the precise location that we wanted for each vent which could then be switched to when the vent was used. I also created a separate camera script for these new vent cameras which allow the player to utilise the cameras to look around before exiting the vents. I included a public limiter which would allow us to determine exactly how far on the X and Y axis each camera could be rotated by. We have discovered two different types of camera shots to utilise with this mechanic which may provide very different effects during gameplay. The first shot utilises the classic security style cameras in front of the vent which allows the player to get a larger overview of the room they are about to enter. The second shot uses a camera inside the vent which provides a point of view shot of the player before they are about to leave the vent. This camera location is something we will have to tinker with and test to ensure that using the vents feel and look satisfying for the player. I have also set it up so that the player can exit the vent at any time by pressing the interaction button again.  We decided to include a minor change in the form of a double jump into the game since one of the primary mechanics will involve movement and platforming. I incorporated this by adding onto the existing jumping system. I limited the jump force of the second jump to be half the initial jump force from the ground to provide a jump in the air which was of reasonable size. I also added the ability for the player to jump off guard’s heads. The reason for this is because we wanted to incorporate some form of “offense” that the player could use if a guard was running towards them and they needed to get past. This jump uses a trigger sphere around the guard’s head to detect whether a jump is available for the player. I also included a minor change to the grapple system which now allows the player to traverse up and down whilst grappling. This effectively allows them to shorten or lengthen the length of their grapple rope.
This week I also spent some more time working on the checkpointing system within the game. To improve on the work I did last week, I decided to learn how to use JSON to serialise and save the data to external files. The reason I have decided to use this is because it allows for the serialization of variables such as vectors which was not possible with the unity default serialization. With the new implementation, I can now save the positions, rotations and ID’s of each enemy within a list at any given time using a button press. I can also load these properties and re assign the properties to the enemies with the respective ID’s. This sets up the basic functionality for checkpointing within the game which also doubles as a saving system which can be used to load saved games data once the game is shut down at a later point in development. This is a system which will be constantly evolving and changing within the game as we need to save more and more data of different types and so it is something I will be working on in the future. My next step will be crating the actual checkpoint zones which will allow the player to save their progress. This was another extremely productive week for me. I built a dialogue system, an event manager, and improved many game features. The first task I performed was hooking up Zac’s laser and alarm panel scripts to my alarm light script so that alarm lights would be set off once the player collides with a laser. Once I had learnt how to properly apply lighting in Unity, the alarm lights created a nice effect, with the red and blue lights bouncing off other surfaces. I added light probes and reflection probes to a small part of the scene to learn how it works. I created a metal material for the air vents which has a reflective quality to it. It looks delicious and I love it very much. The dialogue system was necessary to give the player information from NPCs in the game world since voice acting was out of scope for this project. To make an NPC able to have a conversation, we now simply only need to add a ‘Chatbox’ prefab as a child to the NPC and specify which text file to read the conversation from. The ‘Chatbox’ prefab has a trigger collider on it which initiates the conversation once the player enters the collider. The camera zooms into an over the shoulder angle, looks at the NPC and player movement is locked. The player then presses ‘A’ to progress through the dialogue sequence. The dialogue system supports multiple conversations with a single NPC existing in one text file. A new conversation must be preceded with the tag ‘—BEGIN’ for the system to correctly register as a new conversation. The first prison guard the player meets has multiple conversations. When the player first meets this NPC, there is a conversation in which the player is told to follow the guard to the exercise yard. Another conversation is triggered upon arrival at the exercise yard which instructs the player on what to do. The other tags used in the text file are ‘—PLAYER’ and ‘—NPC’ which determine who is saying the following lines. This is used so that we can show the name of the character that is currently speaking and give the text a colour specific to that NPC. This is all shown in-game on a box which only appears during dialogue. An example of a chat file: --BEGIN --NPC Okok steal the key. Easy as, guard is dumb. --Player ??? --NPC So long I knew there was going to be a lot of events being triggered throughout the prison level. I wanted a clean way of triggering these events without cluttering up existing scripts unnecessarily. To solve this, I created an event manager which stores and invokes functions which are stored in a dictionary with a string key. A script can request that the event manager starts listening to a function, and this function can then be triggered from any other script because the event manager is static. This avoids having to constantly find objects or get components. I incorporated this event system into the dialogue system so that an event can be triggered once a conversation is completed. The ‘Chatbox’ script simply takes a string which is the string key for the function value in the event manager’s dictionary. For example, when the player finished talking to the prison guard for the first time, an event is triggered which makes the prison walk the player to the exercise yard. For many situations, a more generic way of triggering events would be helpful. I created a script which invokes a function based on a trigger collider. With this script, I can specify the string for the event I wish to invoke and a string for the tag of the object that I want to enter the collider. For example, I have an instance of this inside the prison exercise yard area. It checks for the ‘Guard’ tag, and when the prison guard enters the collider, a function is invoked which readies the NPC for the second conversation. The prison guard has a script on him which holds this function. I found that this was a good way to set up events because it means that although the level layout is still likely to change, all I need to do is adjust the collider locations to make it function correctly. I made further improvements to the camera this week. I added a zoom button on the up button which uses the same zoom function as the dialogue system. However, the biggest change I had was making the auto-rotation much less aggressive, and the movement smoother. The camera no longer always tries to move behind the player. Instead, there is a couple second delay of the player not moving the right analogue stick before the camera slowly tries to move behind the player. I also made changes to the free walk zone so that the player is no longer switching between the inside and outside of the free walk zone, which made the camera movement janky. I reworked and cleaned up the inventory system which hadn’t been touched since the prototype. It stores items in a list and now provides static functions for adding items and checking if an item exists in the inventory. This is used for the door and keycard system. I extended Zac’s button script to allow for a required object to be passed in. So if a door, requires a keycard to be opened, that keycard can be added to the required object field on the button before it will activate the door. Lastly, throughout the week I completed lots of little tasks. I cleaned out lots of legacy code and assets. I made the list of controls accessible from anywhere so we don’t need to keep accessing the input manager. I made the stealth AI slightly less silly and fixed some bugs with how the stealth was working with the sound detection system. I also worked on the GDD throughout the week. 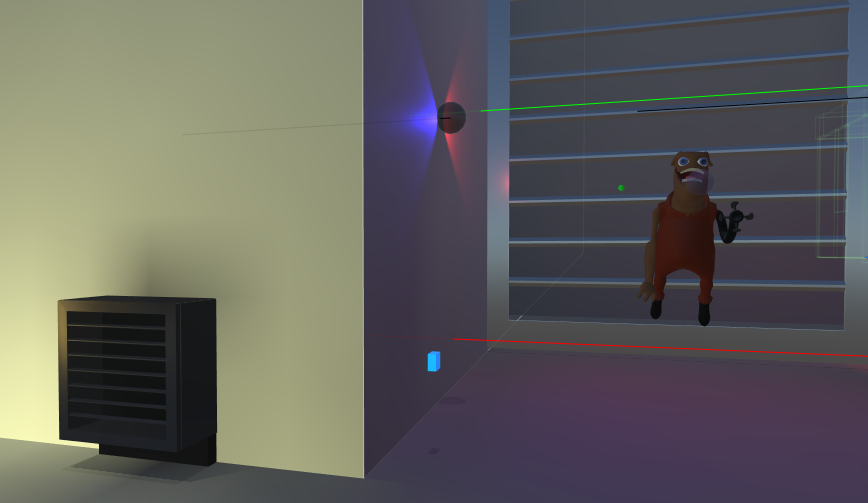 Weeeeeeeeee This week was all about finishing up the level placement while looking into way of doing the animations. We had a huge discussion about the physics of the arm and how it may not work. The concerning bit about this change is that this may change the last living aspect about the original character (and in my opinion a little about the game, we should have already gotten over the fact that this game shares little resemblance from the original game). We decided to have the arm not physics based and just have it all key-animated. This meant that there would be a lot and polish that needed to be put into this. The robot arm that Juane had made for the rig, worked with a separated spline that would have been used instead of the physics arm. Because it had so many bones in the arm, I was afraid that it may be a bit hard to animate but it wasn’t too hard to control if you only manipulate the controller of the end of the arm.
Having decided that we were going to go with the key animation approach, I decided to get a list of all the base animations that we needed from the programming side and once the list was roughly done, I decided to start the bases of animation. Only starting this on Friday, I got the walking done and half of the grapple animation that needed to be completed the next week. When Josh implemented these animations, it gave me a lift of motivation to make these animations look great and it was great for team morale to see all the characters move.
This week, we decided to sort out the overworld. We had a vague idea of what we wanted it to be, and we only need a rough version working for when we implement the other levels of the game. The Vertical Slice will end with the overworld, and the other levels greyed out. We decided that a 3D map of the ‘world’ - essentially a little island where the game takes place - would be the most effective. It’s essentially an interactive menu, in that instead of scrolling and clicking with a mouse or controller to select levels on a map, you instead drive the protagonists van around, selecting levels that way. We took inspiration from Overcooked, but we took it a step further. We implemented one button driving and drifting. Our game will be targeted at children, so we thought that an more interactive menu that also adds context for the overall experience would be richer for this demographic. Our van would hoon around little city blocks, and off into the desert and other areas, banging into stuff, skidding around and making a bit of a mess. We are keeping in mind however that it shouldn’t take too long for a player to drive to a level, so we’ll be figuring out what the longest time should be when traversing the map between level, and never go over that. The map will be easy to make, with very low poly modular assets, and objects lying about the place that the player can send flying when bumped into. We currently have a flat textured van model which we will be updating later.
I spent most of the week optimising my security guard model, and getting it ready for texturing. I talked to Scott, who has taken on the roll of rigging and animating, about what would be best mesh-wise for his rig, so we’re confident that the animations should look really clean and juicy. I had to re-do a few parts of the model because as I was handing it off to scott to rig, I noticed that the shoulder topology was really weird. It seemed okay, but I could see that the edge loops were all wrong. I spent half a day looking at reference and asking other students for help before I got it to a level that I thought was sufficient. While our guard character would most likely not be posing very extremely, I was worried that later down the road if we decided he’d do an overhead attack or reach up to grab something, that the mesh deformation would be really noticeable. I decided that the extra time spent now would be worth preventing possible problems in the future. I spent the tail end of the week in Substance Painter. This was my first real foray into the package. I had previously used it for the prototype to texture characters, so I knew my way around, but I had only previously used basic paint layers. This time round I had to learn how to use generators, masks and a few texture maps i’d never used before. After a lot of frustration with generators, my research led me to curvature maps. I had previously not used these before, and in all honesty had no idea what they were used for. I tried to generate a few of these, but had horrible results. After again consulting my classmates and researching further, I did end up with a reasonably decent curvature map. This week ends with me having finished the characters mesh, and having a substance painter session set up for texturing early next week. I spent a lot of time this week in new ground, with a lot of trial and error and perhaps wasted time. I am heading comfortably into next week however, knowing how the pipeline works for future models. I’m hoping that the time spent this week will save time exponentially as we head further into the project. A bit of a theme this week ;) This week for me was mostly about building the level. After Corne gave me the level assets, I set about putting them into the prison scene. Initially, Corne gave me prebuilt components. Some of these components were slightly out, so Corne pulled them apart into sections, which allowed me to rebuild the level in sections. The only problem with this method was that the mesh colliders did not work. This is because of the way that the mesh colliders are auto generated – because there were no roof or floor components included. This caused collider boxes to be drawn over the doorways and gaps, as well as weird colliders on diagonal pieces.
As a result, I had to craft all of the box colliders by hand, creating game objects and rotating them in order to make sure that the colliders were accurate to geometry. This took me quite a while. In addition to this, I also made the Laser-Alarm panel functionality complete. The Lasers are all stored as children of the Alarm Panels, which are alerted whenever the player walks into a laser beam. The lasers also use raycasts, which in the longer term will be more efficient (however slightly) than the cylinder colliders. During the week, I also implemented two key components of the stealth system – the percentage check, and the disguise system. The percentage check is a system that allows the AI vision of the player to change depending on how much of the player is visible. If the percentage of the player visible is higher, the ‘notice meter’ fills up much faster. If only a hand or foot is visible, then the percentage change is noticeably lower. This allows us to play around with variable percentage vision, and reward players who keep mostly out of sight. The disguise system was only completed today, but the bulk of the disguise tiers theory was done in the previous week. The disguise system now includes ‘accepted disguises’, as part of an area system. In certain areas, players’ disguises will be regarded as appropriate – meaning they fit into the level. For example, if the player is wearing a jumpsuit in a guard area, they will be noticed much faster than if they are wearing a guard outfit. This ties into the disguise percentage system, adding extra complexity to how disguises work. The plan for week 4 is to hook all of these systems up to the existing Laser and Alarm system components, which will allow for a complete level playthrough by Wednesday this week. 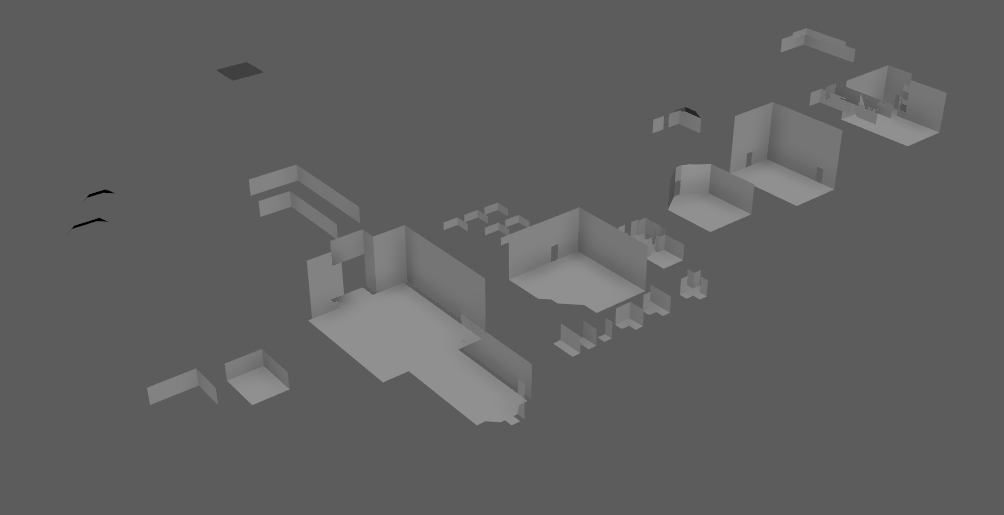 This week I worked on finishing the level design layout, and then proceeded to model the modular pieces for each of the parts of the our first level. There are 4 unique rooms in the level, the rest are completely modular. The unique rooms are built to snap to any of the modular corridor pieces I have made. This means that once the level is finished being put together in Unity with collision prefabs we can start testing mechanics in the true level space. The modularity of the design pieces means that we can quickly iterate and change the level or completely build a new one very quickly.
The modular pieces at this stage are quite basic but their scale has been increased a fair bit form our first iteration. The reason for this is that the space afforded to player movement was not enough and felt far to claustrophobic. Ive also started designing and modelling the level select overworld this week. The overworld serves as a mini game and level select screen. This ties in with the UI design that Im working on. |
AuthorContrary Scholars ArchivesCategories
All
|


 RSS Feed
